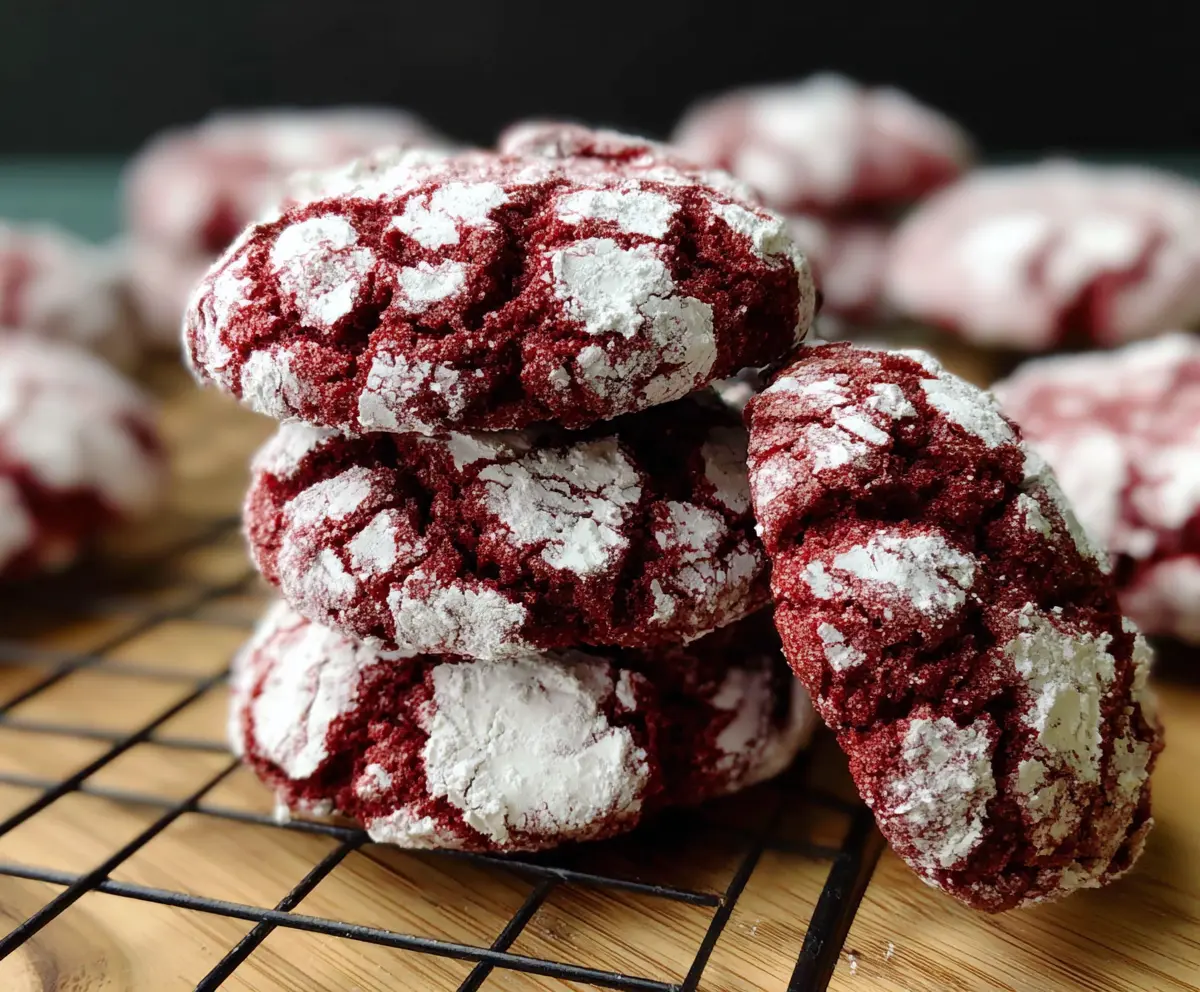
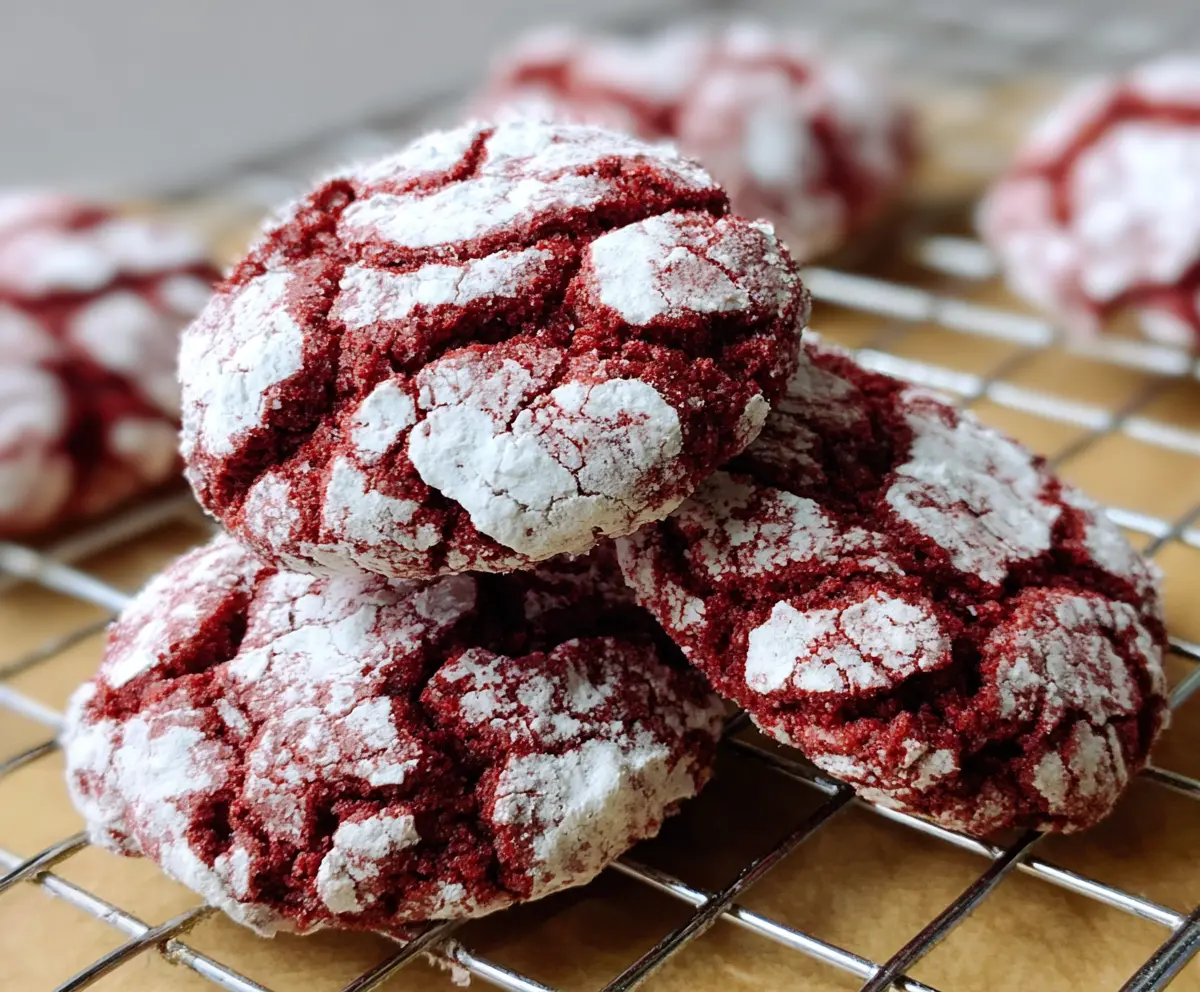
Red Velvet Crinkle Cookies are a festive treat that brings together the rich, chocolatey flavor of red velvet with a fun, snowy white crinkle pattern on top. They have a soft and chewy texture with a little bit of a powdered sugar coating that melts in your mouth. These cookies are perfect if you love the classic taste of red velvet cake but want something a bit easier and quicker to enjoy!
I love making these cookies around holidays or for special occasions because they always get compliments and disappear fast! A little tip I’ve found helpful is to chill the dough before baking—it really helps the cookies keep their shape and get that beautiful crackled look. Plus, rolling them in powdered sugar makes them look extra magical, like little red and white snowballs.
My favorite way to enjoy these cookies is with a cold glass of milk or a cup of hot cocoa when I want a cozy treat. They’re great for sharing with friends or packing in a lunchbox to brighten someone’s day. Every time I make them, it feels like a little celebration, and I’m pretty sure everyone who tastes them feels the same way!
Key Ingredients & Substitutions
All-purpose flour: This is the base for your cookies, providing structure. You can swap it with a gluten-free flour blend if needed, but check that it’s a 1-to-1 substitute for best results.
Cocoa powder: Adds that subtle chocolate flavor typical of red velvet. Use unsweetened cocoa for the best taste. If unavailable, natural cocoa works but may slightly change the flavor.
Red food coloring: This gives the cookies their iconic red color. You can use gel food coloring for a more vibrant color with less liquid. Beet powder is a natural substitute but may alter flavor slightly.
Buttermilk & vinegar: These add tang and react with baking powder to keep cookies tender and light. If you don’t have buttermilk, mix milk with a tablespoon of lemon juice or vinegar and let it sit for 5 minutes before using.
Powdered sugar: Rolling the dough in powdered sugar creates the cracks on the cookie surface. Don’t substitute with granulated sugar here, as it won’t give the same effect.
How Do You Get Those Beautiful Crinkles in the Cookies?
The crinkle effect happens because of the powdered sugar coating over a chilled dough that spreads and cracks during baking. Here’s how to get it just right:
- Chill the dough for at least 2 hours. This firms it up, making it easier to roll and less likely to spread too quickly in the oven.
- Use a generous amount of powdered sugar. The more you cover the dough, the more contrast you’ll get between red cookie and white sugar cracks.
- Don’t flatten the dough balls—keep them round to encourage cracking as they bake.
- Bake at 350°F (175°C) until the cookies puff and cracks appear, usually 10-12 minutes.
Following these steps will give you those lovely, snowy cracks that make red velvet crinkle cookies so inviting and tasty.
Equipment You’ll Need
- Mixing bowls – a couple of sizes help separate dry and wet ingredients easily.
- Electric mixer or hand mixer – makes creaming butter and sugar quick and smooth.
- Measuring cups and spoons – for accurate measurements, especially with baking powder and vinegar.
- Baking sheet – choose a sturdy one to bake cookies evenly without warping.
- Parchment paper or silicone baking mat – prevents sticking and makes cleanup easy.
- Cooling rack – lets cookies cool properly and keeps bottoms crisp.
- Scoop or tablespoon – for portioning dough evenly into cookie-sized balls.
Flavor Variations & Add-Ins
- Mix mini white chocolate chips into the dough for a sweet, melty surprise that pairs well with red velvet’s tang.
- Add a teaspoon of instant espresso powder to boost the chocolate flavor subtly without coffee taste.
- Stir in chopped pecans or walnuts for a nice crunch and nutty contrast.
- Swap red food coloring with natural beet juice or powder for a vibrant color without artificial dyes.
How to Make Red Velvet Crinkle Cookies
Ingredients You’ll Need:
Main Ingredients:
- 1 ½ cups all-purpose flour
- 2 tablespoons unsweetened cocoa powder
- ½ teaspoon baking powder
- ¼ teaspoon salt
- ¼ cup unsalted butter, softened
- 1 cup granulated sugar
- 1 large egg
- 1 teaspoon vanilla extract
- 1 tablespoon red food coloring
- 1 teaspoon white vinegar
- ½ cup buttermilk
For Rolling:
- ½ cup powdered sugar
How Much Time Will You Need?
Prepare for about 15 minutes of active preparation. The dough needs to chill in the fridge for at least 2 hours to get firm and ready for rolling. Baking takes 10-12 minutes per batch, plus a few minutes to cool. Overall, plan on roughly 2 hours and 30 minutes from start to finish.
Step-by-Step Instructions:
1. Mix Dry Ingredients:
In a medium bowl, whisk together the flour, unsweetened cocoa powder, baking powder, and salt. Set this bowl aside for later.
2. Cream Butter and Sugar:
In a large bowl, beat the softened butter and granulated sugar using an electric mixer until the mixture is light and fluffy, which usually takes a few minutes.
3. Add Wet Ingredients:
To the butter and sugar mix, add the egg, vanilla extract, and red food coloring. Mix everything together until it’s smooth and well combined.
4. Stir in Vinegar and Buttermilk:
Pour in the white vinegar and buttermilk, stirring gently to combine all the wet ingredients.
5. Combine Dry and Wet Ingredients:
Gradually add the dry mixture to the wet mixture, stirring just until everything is combined. Be careful not to overmix, as this can make the cookies tough.
6. Chill the Dough:
Cover your dough with plastic wrap and place it in the refrigerator to chill for at least 2 hours. This helps the dough firm up and makes rolling easier.
7. Prepare for Baking:
Preheat your oven to 350°F (175°C). Line a baking sheet with parchment paper or use a silicone baking mat to keep the cookies from sticking.
8. Shape the Cookies:
Scoop out tablespoon-sized portions of chilled dough and roll each portion into a smooth ball.
9. Roll in Powdered Sugar:
Coat each dough ball generously in powdered sugar, making sure they are fully covered. This will create the beautiful crackled look on the cookies.
10. Bake:
Place the sugar-coated dough balls on the prepared baking sheet, leaving about 2 inches of space between them. Bake for 10 to 12 minutes, or until the cookies have puffed up and the crackled, snowy surface appears.
11. Cool and Enjoy:
Let the cookies cool on the baking sheet for 5 minutes, then transfer them to a wire rack to cool completely. Now, your tender, chewy red velvet crinkle cookies are ready to enjoy!
Can I Use Frozen Dough for These Cookies?
Yes! You can freeze the dough balls after rolling them in powdered sugar. Just place them on a baking sheet to freeze solid, then transfer to a freezer-safe container. Bake straight from frozen, adding a couple of extra minutes to the baking time.
What Can I Substitute for Buttermilk?
If you don’t have buttermilk, mix ½ cup milk with 1 tablespoon lemon juice or white vinegar. Let it sit for 5 minutes before using. This homemade buttermilk substitute works great in the recipe.
How Should I Store Leftover Cookies?
Store red velvet crinkle cookies in an airtight container at room temperature for up to 4 days. For longer storage, freeze them in a sealed container for up to 3 months. Thaw at room temperature before eating.
Can I Make These Cookies Without Red Food Coloring?
Absolutely! You can omit the red food coloring for a chocolatey twist, or use natural alternatives like beet powder for color. Just keep in mind natural options may subtly alter the flavor and appearance.