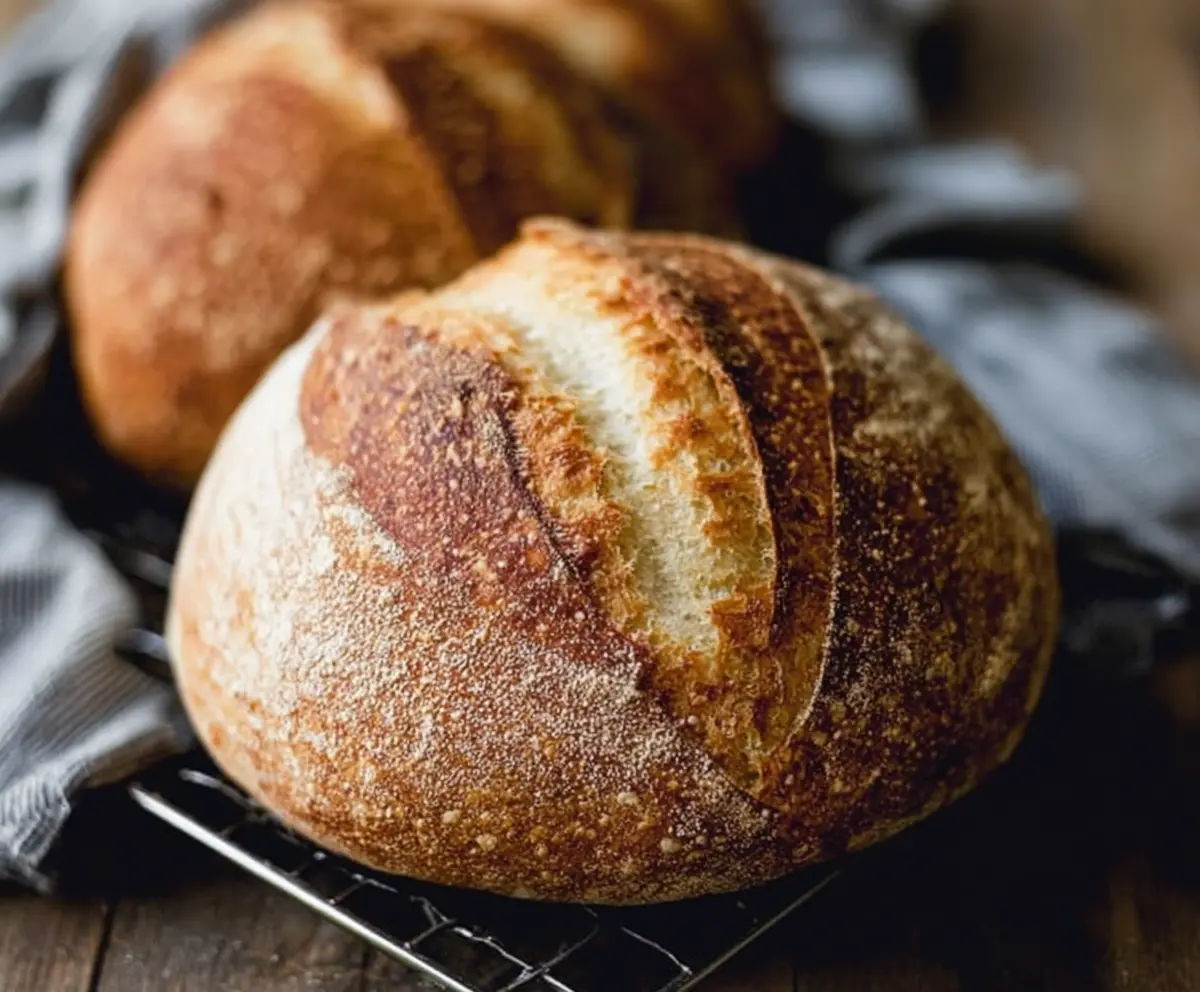
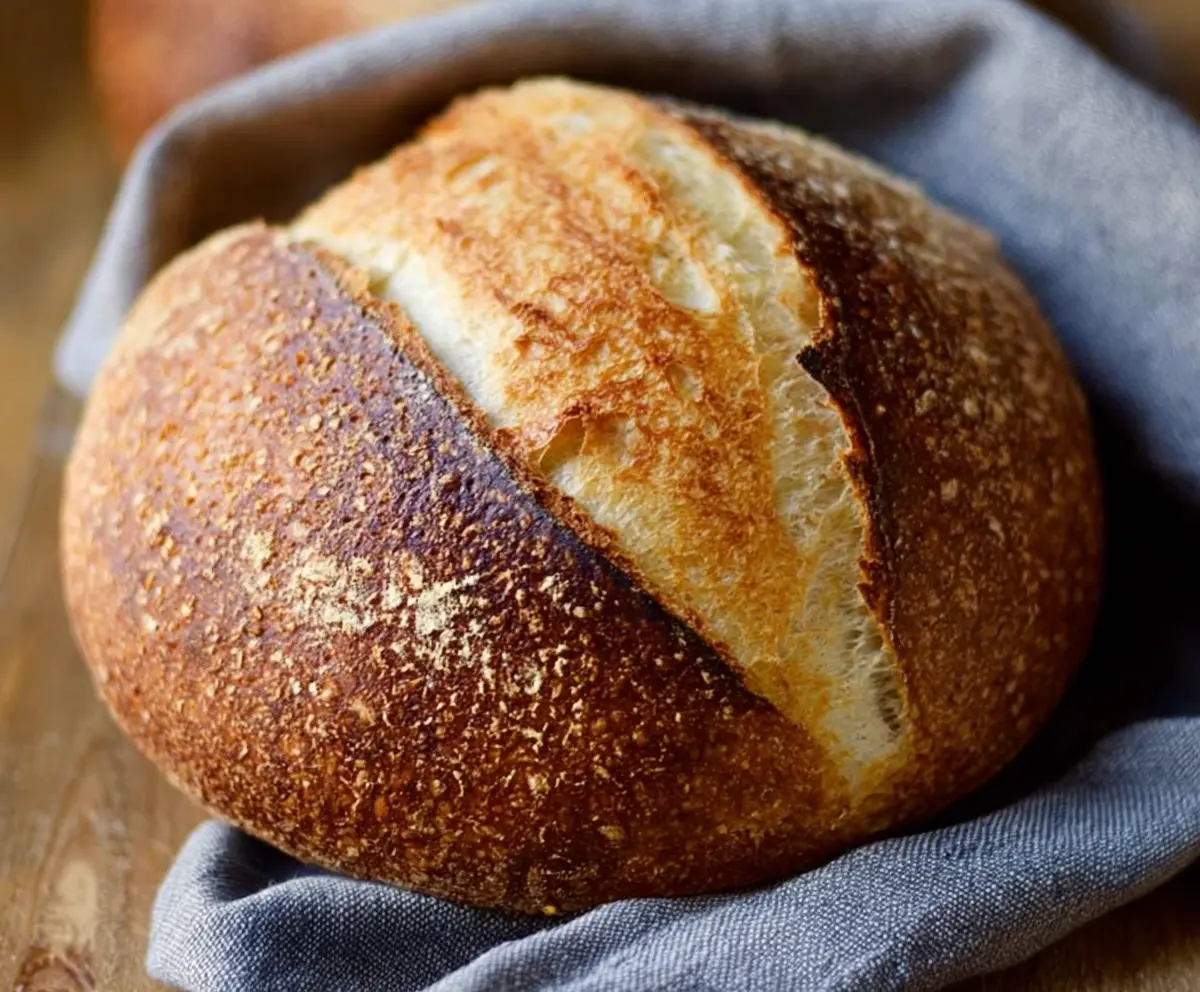
Best Ever Sourdough Bread Recipe is all about that perfect crusty outside and soft, chewy inside that makes every bite special. With simple ingredients like flour, water, salt, and a lively sourdough starter, this bread has that classic tangy flavor that sourdough lovers can’t get enough of. It’s a little patience and a lot of love that brings this loaf to life.
I remember the first time I nailed this recipe — the smell alone made my kitchen feel like a cozy bakery. I like to follow each step carefully, especially when it comes to folding the dough and waiting for it to rise. It’s amazing how a few little bubbles in the starter and the right timing can totally change the final bread. I always tell myself, baking sourdough is a bit like a fun science experiment that you get to eat at the end.
My favorite way to enjoy this bread is to slice it fresh and slather on some creamy butter or homemade jam. It’s perfect for sandwiches, toast, or just snacking with a bit of soup. Plus, once you make this loaf, you’ll feel proud knowing you can make sourdough bread anytime you want — it really is the best ever homemade bread!
Key Ingredients & Substitutions
Bread flour: This gives the bread structure and chewiness thanks to its high protein. All-purpose flour works too, but the crust might be a little softer. Whole wheat flour can add a nutty flavor but use just 20-30% mixed with white flour for best results.
Water: Room temperature water hydrates the flour for gluten development. Avoid very cold water, which slows fermentation, or very hot, which can kill the wild yeast in your starter.
Sourdough starter: This is the heart of your bread’s flavor and rise. Make sure your starter is active and bubbly to get a good rise. If you don’t have a starter, you can make one from scratch, but it takes about 5–7 days.
Salt: Essential for flavor and controlling fermentation. Don’t skip it! You can use sea salt, kosher salt, or table salt, just check to adjust quantities as needed since salt grain size varies.
How Do You Master the Stretch and Fold Technique?
This step strengthens the dough without kneading, which helps create a chewy texture and nice open crumb. Here’s how to do it right:
- Wet your hand to prevent sticking.
- Reach under the dough, gently pull one edge up without tearing.
- Fold that edge over the center of the dough.
- Turn the bowl and repeat on all four sides.
- Do this every 30 minutes during the first 2 hours of bulk fermentation.
This slow approach lets gluten develop gradually and traps gas bubbles, making your bread rise beautifully with great texture.
Equipment You’ll Need
- Large mixing bowl – perfect for mixing and letting your dough rest without spilling.
- Dutch oven with lid – traps steam to create a crispy, golden crust like a professional bakery.
- Banneton basket or bowl lined with a floured towel – helps shape the dough and keeps it from sticking while proofing.
- Bread lame or sharp knife – to score the dough before baking, letting it expand properly in the oven.
- Cooling rack – allows the bread to cool evenly and keeps the crust crisp.
Flavor Variations & Add-Ins
- Add 1/2 cup chopped olives or sun-dried tomatoes for a zesty Mediterranean twist; fold them in after the first stretch and fold.
- Mix in 1/4 cup toasted nuts or seeds for added crunch and nutty flavor; great for sandwiches or snacking.
- Swap 20-30% of the flour for whole wheat or rye to deepen flavor and add complexity.
- Try stirring in 1-2 teaspoons of dried herbs like rosemary or thyme to freshen up the taste.
How to Make Best Ever Sourdough Bread (Step-by-Step)
Ingredients You’ll Need:
Main Ingredients:
- 500g (about 4 cups) bread flour or all-purpose flour
- 350g (1 1/2 cups) water, room temperature
- 100g (about 1/2 cup) active sourdough starter (fed and bubbly)
- 10g (1 1/2 tsp) salt
- Optional: extra flour for dusting and shaping
How Much Time Will You Need?
This sourdough bread takes about 5 to 6 hours for active preparation and fermentation during the day, plus an overnight proof in the fridge for 12 to 18 hours. Baking and cooling take an additional hour, so plan ahead to enjoy fresh homemade bread by the next day.
Step-by-Step Instructions:
1. Mixing and Autolyse:
In a large bowl, mix the flour and water gently until you have a shaggy dough. Cover the bowl with a towel or plastic wrap and let it rest for 30-45 minutes. This resting time, called autolyse, helps the flour absorb water and start gluten development.
2. Adding Starter and Salt:
After the autolyse, add your bubbly sourdough starter and salt to the dough. Mix thoroughly using your hands or a spoon until everything is well incorporated and the dough feels cohesive.
3. Bulk Fermentation with Stretch and Folds:
Cover the bowl and let your dough rise at room temperature for 4 to 5 hours. Every 30 minutes during the first 2 hours, perform a gentle stretch and fold: wet your hand, pull one side of the dough up and fold it towards the middle, rotating to repeat on all four sides. This technique strengthens the dough and helps build structure.
4. Shaping Your Loaf:
Turn the dough onto a lightly floured surface. Fold the edges into the center to form a ball, then flip it so the smooth side is up. Use cupped hands to gently pull the dough towards you to tighten the shape.
5. Proofing Overnight:
Place your shaped dough, seam-side up, into a well-floured banneton basket or a bowl lined with a floured kitchen towel. Cover and refrigerate overnight for 12 to 18 hours. This slow proof develops flavor and makes the dough easier to handle.
6. Preheating the Oven:
When ready to bake, place a Dutch oven with its lid inside your oven. Preheat the oven to 475°F (245°C) for at least 30 minutes to get it very hot, which helps create a crispy crust.
7. Scoring and Baking:
Carefully turn your dough onto a piece of parchment paper. Using a sharp knife or a bread lame, gently score a shallow slash across the top of the dough. This lets your bread expand during baking. Place the dough (on the parchment) into the hot Dutch oven, cover with the lid, and bake for 20 minutes.
8. Finishing the Bake:
Remove the lid and bake the bread uncovered for another 20-25 minutes until the crust is a deep, golden brown and wonderfully crisp.
9. Cooling Before Slicing:
Take the bread out of the oven and place it on a wire rack. Let it cool completely — this is important because it finishes setting the crumb and makes slicing easier.
Enjoy your beautiful, crusty sourdough bread with butter, jam, or your favorite topping. Happy baking!
Can I Use Frozen Sourdough Starter?
Yes! Just make sure to thaw it in the fridge overnight and feed it a couple of times until it’s bubbly and active before using in your dough for the best rise.
Can I Make This Dough Without a Dutch Oven?
Absolutely! You can bake the loaf on a preheated baking stone or sheet and create steam by placing a pan of hot water in the oven or misting the oven walls with water during the first 10 minutes to get a crispy crust.
How Should I Store Leftover Sourdough Bread?
Keep your bread in a paper bag or loosely wrapped in a kitchen towel at room temperature for up to 3 days. Avoid plastic bags as they trap moisture and make the crust soggy.
Can I Add Flavors or Seeds to This Recipe?
Definitely! Fold in nuts, seeds, dried herbs, or olives during the stretch and fold process for added texture and flavor. Just be mindful not to add too much or it might affect the dough’s structure.